
This guide is for anyone who just picked up Worship and is staring at the screen wondering how the blood gauge, follower queue, and god selection actually fit together. Below I’ve laid out the core systems — the gods, your protagonist, followers, magic, catalysts, and the major events you’ll encounter — so you can stop guessing and start playing with intent.
I put this together because the opening hours of Worship throw a lot at you at once, and a few mechanics (looking at you, blood recovery and follower stock) aren’t as obvious as they first seem. Getting these basics down early saved me a lot of unnecessary game-overs, and I’d rather you skip that particular learning curve.
How Gods Change Your Run
The god you pick shapes almost everything about how you play. It determines the maximum number of followers you can bring along, your basic magic, and the unique facilities available to you — so the choice is far more than cosmetic. At the start you only have one option, but unlocking prophecies (achievements) expands your roster.
Your starting god is simple and reliably solid, which makes sense given it’s the only one available from the beginning. Its strengths are:
- You can carry a large number of followers.
- Its unique magic is a stockable offensive spell that’s handy for breaking shields.
- Performing the sacrifice ritual restores blood, so you can ritual freely and gather items more easily.
- You can convert catalysts into relics by bringing them to the unique facility, making it simpler to secure followers and reputation.
Your Protagonist: Blood, Movement, and Evasion
Casting magic costs blood from the gauge in the lower-left corner of the screen. When that gauge hits zero, it’s game over — so don’t drain it carelessly. Attacks and hazards also chip away at your blood, which means keeping your distance from enemies is usually the smarter play.
You recover the gauge by pressing Ctrl to collect blood. Red objects are your main source, but blood on the floor can be collected too. For movement you have two options: WASD for up/down/left/right, or left-click to move toward the cursor. I lean toward the mouse since it makes diagonal movement smoother and drawing shapes easier, but use whichever feels natural.
Pressing Shift makes you dive along with your queue for an emergency evade. The recovery lag afterward is substantial, so you can’t spam it — I learned that the hard way when a dive left me wide open.
Gaining and Managing Followers
You grow your following by trapping godless ones inside a circle and activating a ritual. There are several ways to make godless ones appear:
- Destroy houses or cages.
- Offer relics (items including purple ones) at the altar in your base.
- Break barrels and wooden crates (very low chance).
- They emerge from sacrificial treasure chests (low chance, one per chest).
How many followers you can lead at once depends on your chosen god, skills, and facilities. Anyone over the cap goes into stock, and they’re refilled when you acquire a new follower or interact with the church in your base. That last detail matters: if you can’t do either of those two things, you can’t pull followers out of stock at all.
Commanding Followers in Combat
Right-click sends a single follower charging at an object or enemy, while holding right-click sends several at once. Good to know — if you release the click before they attack, they’ll come back without striking. To cancel an attack outright, press R and hover your cursor over the attacking follower to return them to the queue.
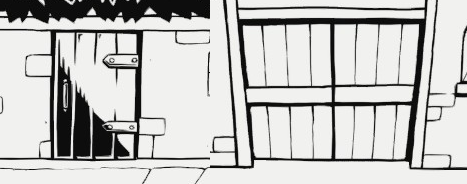
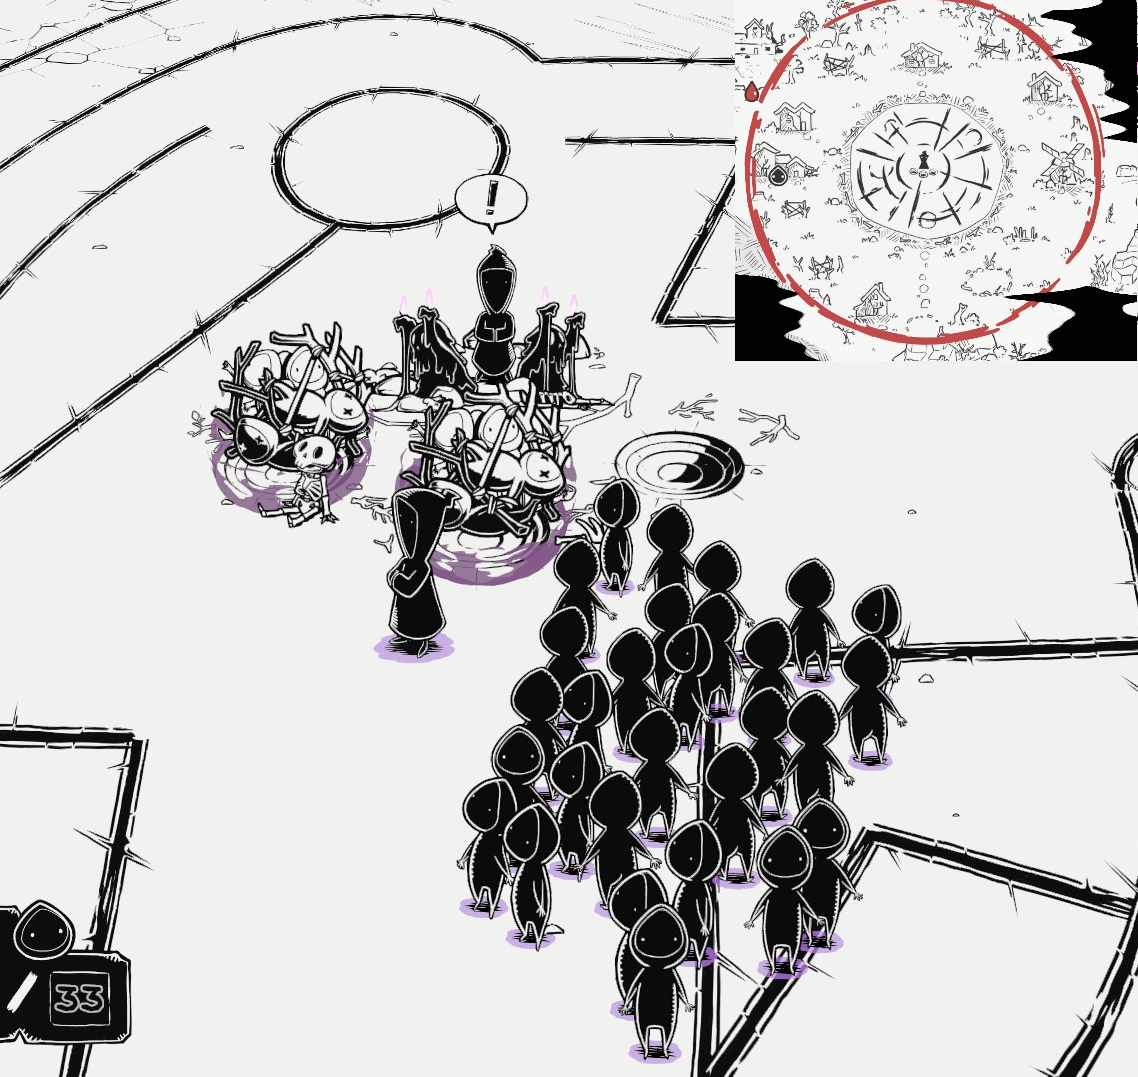
You can tell which objects are attackable by the way your cursor snaps to them, and the color depth gives it away too. Anything with a black shadow over it, like the left side of the image below, is very likely breakable.
Grabbing and Throwing Followers
Pressing F grabs the nearest follower. Hold right-click, move the mouse to aim, then release to throw them. A thrown follower can smash shields, ring bells, break targets, and trigger other gimmicks.
While holding a follower, pressing Space stabs the follower instead of yourself to draw a shape — and yes, the follower dies. In other words, you can sacrifice a follower to generate blood, which doubles as an emergency heal. It’s grim, but it’s saved me more than once.
Carrying Objects and Dismissing Followers
Right-clicking a carryable object tells a follower to transport it. Some objects are too heavy for one follower, so add more as needed. Pressing V leaves your followers where they stand — note that any objects they’re holding drop to the ground, so double-check you’ve moved everything before walking away. To re-add them to the queue, press R to call them back.
Magic and How to Equip It
Magic costs blood and delivers powerful attacks or support effects. You start with three spells: follower conversion, sacrifice, and one unique to your god. To gain more, set catalysts at your base or unlock prophecies.
Spells must be equipped before use. Open the menu with TAB, pick the spell, then choose the shape you want to assign — that’s how it becomes usable. Some spells, like sacrifice, need no equipping and come with a fixed shape.
Depending on the spell, it either fires instantly or adds a charge to the lower-right stock that you spend with E. If you press E with no stock available, you’ll cast your god’s basic magic instead. The starting god’s basic magic is a weak ranged attack — cheap to cast but so low in power that I rarely bother with it.
Catalysts
A catalyst is an item with a dark creature sealed inside a crystal. Carry one to the purple diamond at your base and set it there to randomly gain either a passive skill or a spell. The spot you set it becomes an object, and hovering over that object on the TAB map lets you review the skill or spell’s effect.
If you don’t want a skill, you can attack and destroy the object to discard it — though the catalyst won’t be returned, so think before you smash.
Major Events
Open the map and you’ll find points besides your base already recorded. At these spots, major events — large-scale puzzles or battles — wait for you to clear them, and doing so greatly boosts your cult’s influence. Lost items and the like are found inside the red lines on the map, so check now and then that you haven’t wandered too far off. Some events even have multiple ways to solve them.
The Artist
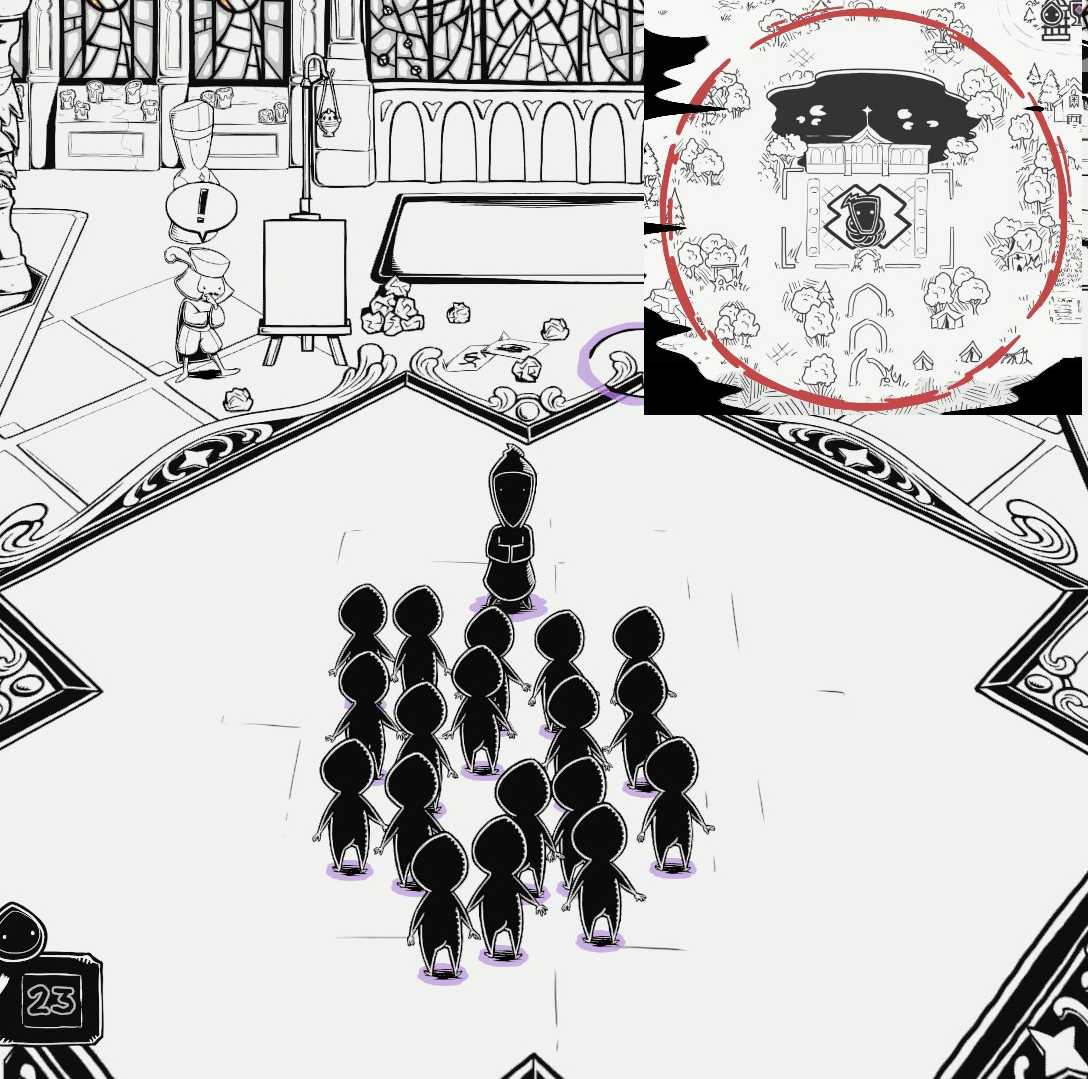
Defeating the warrior and priest at the top prevents you from completing restoration or drawing. Fortunately, they won’t attack unless you strike first, so you can approach on your own terms.
Restoration route: find three pillars and the coffin, then place them in the empty spaces.
Drawing route: draw the mark attached to the coffin onto the floor in the center of the area. There’s a faint guide line, so trace over it — the example above shows a guide line combining a square and a cross.
Pillage route: simply defeat the warrior and priest at the top.
The Otherworldly Music Troupe
Four skeletal musicians are scattered around the village. Carry all four to the central stage and set them up to clear the event. They hide in the following patterns, and you’ll hear music as you approach a hiding spot:
- Inside a building.
- Dig up a hand sticking out of the ground.
- Ring a bell by throwing a follower at it.
- Solve a shape-tracing puzzle.
The Sealed Giant God
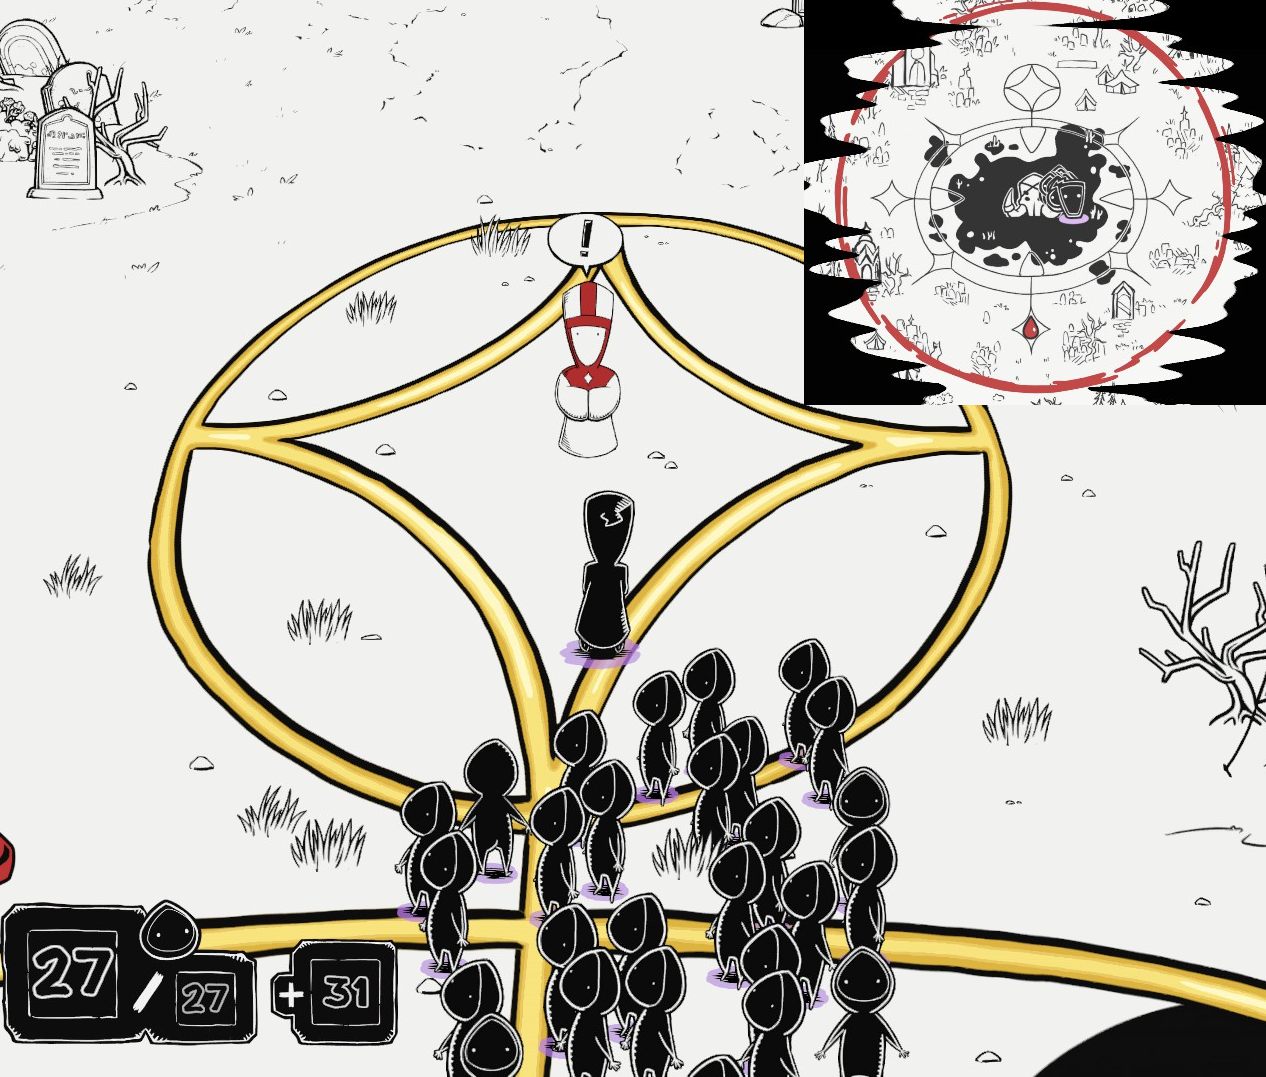
Sealing route: talk to the priest at the top of the area, and after the conversation ends, four stakes are summoned. Carry them and set them into the cross-shaped fissures. Once the stakes are in, area attacks come at you periodically, so stay alert. After that, trace the shield-like shapes around each staked spot with blood, and once everything’s done, speak to the first priest to claim your reward.
Unsealing route: destroy every object sealing the giant god. Break all the statues connected by surrounding chains, and drain every purple cup dry using blood absorption to finish it.
The Summoning Ritual
You need to trace the entire pattern inside the giant circle with blood and carry three orbs containing people to the center. The pattern is enormous, so this demands a huge amount of blood.
Once the pattern is drawn and the orbs are in place, the ritual begins and multiple monsters are summoned — defeat them to clear it. Because of that, I’d set the orbs first and draw the pattern afterward; doing it the other way around starts the fight while you’re low on health, so the order you tackle things really matters here.
Completing this is also required for the prophecy-related quest that unlocks Hubris.