
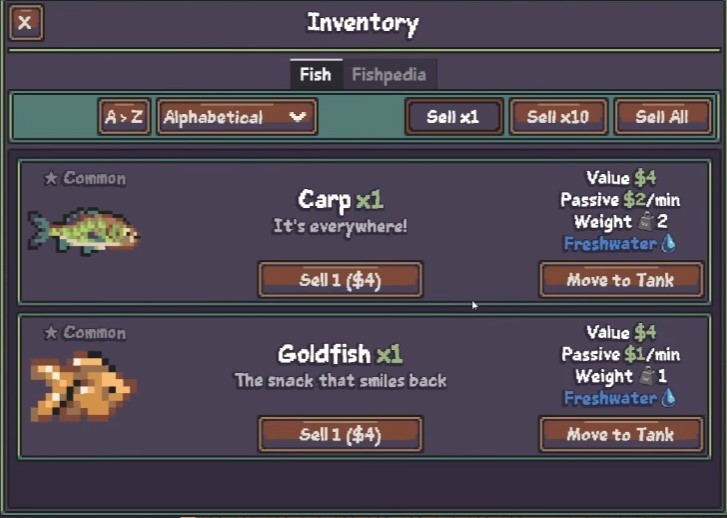
Carp sell for four bucks and everyone treats them like garbage — until you realize a tank full of them quietly prints two dollars a minute while you’re off catching catfish. That’s the entire rhythm of Lured In in one sentence: what looks worthless on the hook becomes the backbone of your passive income once it’s swimming in a tank. This guide breaks down the fishing mechanics, which fish are actually worth your time, how to build out your aquarium for steady offline earnings, and the upgrade order that gets you there fastest.
Game Overview 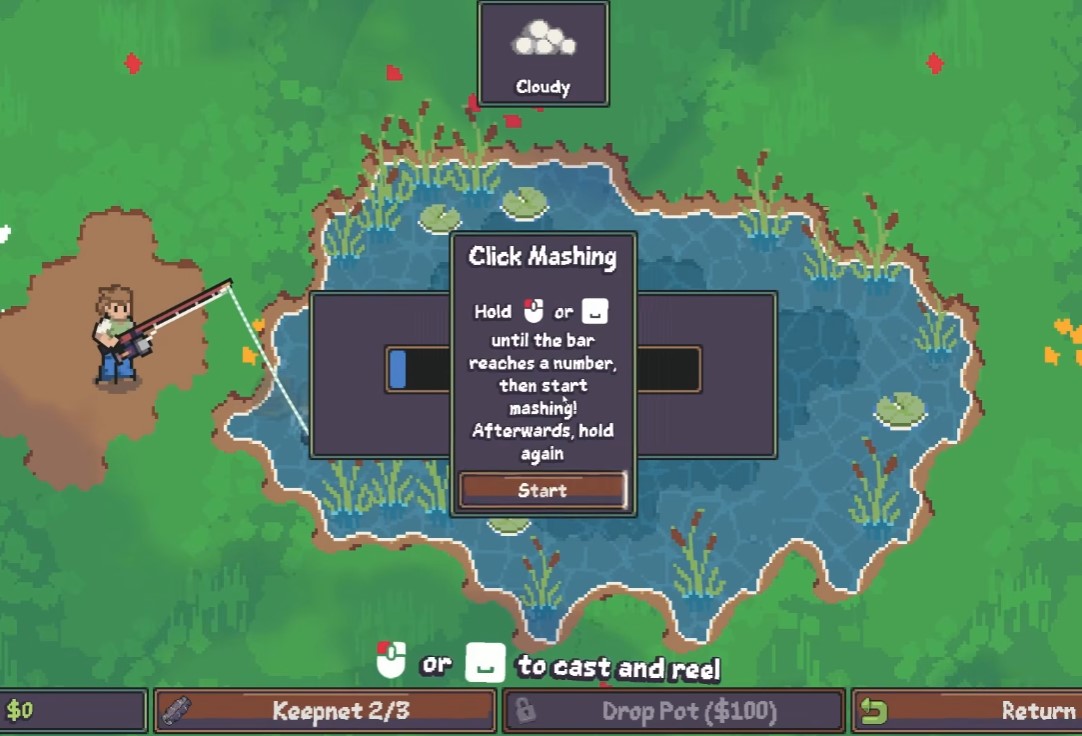
You inherit a rundown aquarium from your grandfather, and the whole game is about turning that dump into something that pays for itself. The loop is simple on paper: cast a line, catch fish, sell some, tank the rest, repeat. What makes it stick is the idle layer underneath — tanks keep generating money whether you’re actively playing or not, so your progression never fully stalls.
The fishing itself runs on a bobber-region mini-game, and you’ll bounce between multiple lakes as you unlock them, each with its own mix of species and rarity. Nothing here is punishing, but the systems interlock enough that ignoring one (like tank management) will quietly cap your income no matter how good you get at casting.
Fishing Mechanics
The core skill is holding your bobber inside the fisher region — left click or space bar, held down, while the bobber drifts. It sounds trivial and mostly is, but two details change how you actually approach a cast.
First: a full cast, meaning maximum distance, gives you a 2x bite rate bonus. If you’re lazy about your casting distance you’re leaving half your catch rate on the table for no reason.
Second: weather and depth gate specific species. Shallow and deep water hold different fish, and rain changes behavior outright — catfish get noticeably more aggressive when it’s raining, and Oronda may not bite at all unless it’s raining. Watch for bubbles on the surface; that’s your tell that fish are actually present before you waste a cast.
The tackle box upgrade is worth grabbing early since it passively improves your catch odds without you having to get better at the timing yourself.
Fish Species & Value
Not every fish is worth the same, and the game is upfront about which ones are filler. Here’s the breakdown:
| Fish | Sell Value | Passive Income (tank) | Notes |
|---|---|---|---|
| Carp | $4 | $2/min | Common, low sell value, decent tank filler |
| Minnows | Low | — | Common early catch |
| Goldfish | Low | — | Common early catch |
| Bluegill | Low | — | Common, starting pond staple |
| Catfish | Good | $4/min | Can be aggressive on the line, more active in rain |
| Oronda | Rare | — | Weighs 1 lb, rain-only catch |
| Tilapia | Moderate | — | — |
| Rainbow Trout | Moderate | — | — |
| Rudd | Moderate | — | — |
| Northern Pike | High | — | Large, aggressive fight |
| Sloppia | Unknown | — | Late-game variety |
The Fishpedia tracks your catch rates per species, and some of these bottom out at a 4% catch rate — so don’t expect to fill out that log quickly. Carp get talked about like junk fish (players outright call them worthless to sell), but that $2/min in a tank adds up fast once you’ve got several running at once. Catfish are the better long-term hold at $4/min, so prioritize keeping catfish in tanks over selling them outright once you’ve got a few tanks online.
Aquarium Management & Upgrades
Every fish you pull in has two possible fates: sell it to Gramps for instant cash, or stock a tank for ongoing passive income. Tank income scales with the fish’s weight and species, which is why heavier catfish outperform lighter carp per fish even though carp are more common.
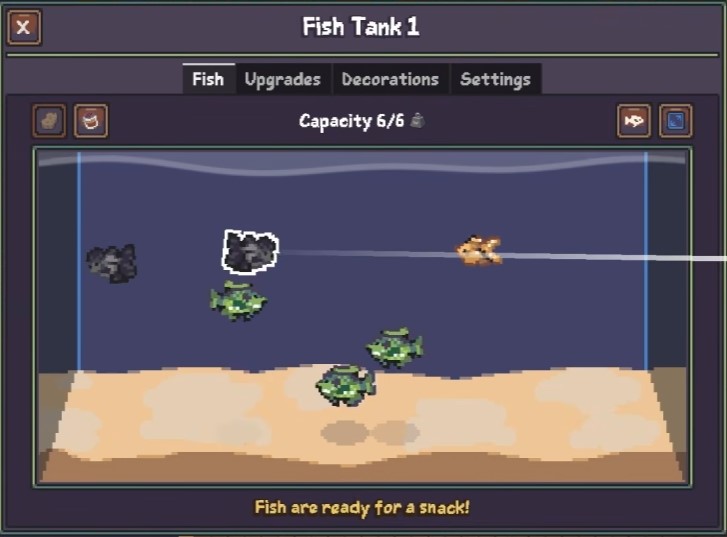
New tanks cost $100 each, and that price point makes early expansion a real decision — do you buy a second tank now or hold cash for equipment? The upgrade tree gives you several levers:
- Fish Food — increases fish weight and boosts income by 50% for 15 minutes. Great short burst, not a permanent fix.
- Marketing — increases customer earnings by 25%, a flat multiplier worth prioritizing once you have multiple tanks running.
- Equipment — improves your fishing gear directly, feeding back into catch efficiency.
- Research — unlocks new items but takes 5 minutes per tier, so queue it and go fish instead of watching the timer.
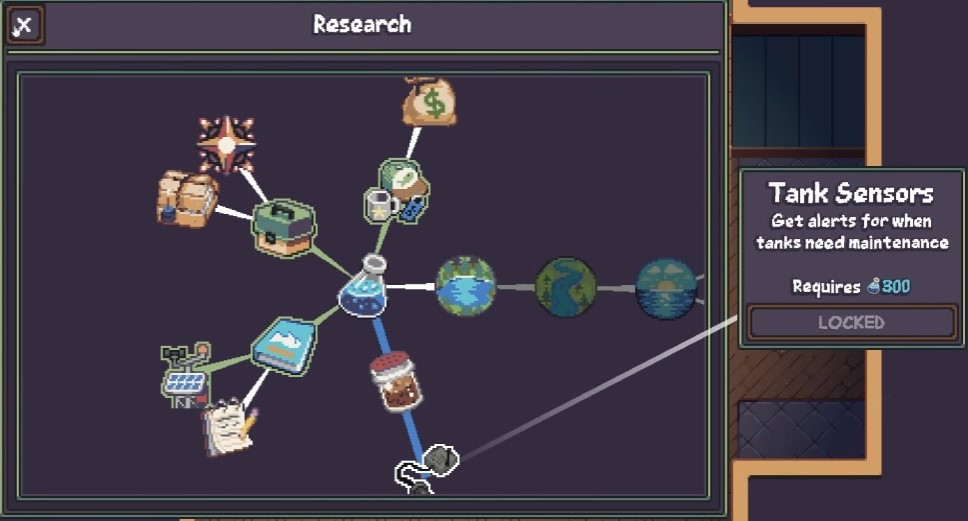
- Weather Station — tells you upcoming weather, which matters a lot given how rain-gated species like Oronda are.
- Tip Jar — adds customer tips on top of your base tank income, small but stacks over time.
Because the game runs an idle/offline system, checking your “Max offline time” setting matters more than it sounds — that number determines how much progress accumulates while you’re not playing, so don’t ignore it in the menus.
Progression & Locations
Your starting pond is mostly carp, bluegill, and minnows — fine for cash flow early, but you’ll hit a ceiling fast. Traveling to a new lake costs money (roughly $100 for the first jump), and that’s where rarer, higher-value fish like Northern Pike and catfish start showing up in real numbers.
The shop menu is your control center: Inventory, Tanks, Research, Marketing, Equipment, and Travel all live there, so get comfortable navigating it early rather than hunting for options mid-session.
Character customization — hair, clothes — is purely cosmetic but a nice touch if you’re spending hours staring at your own avatar on the dock.
Late-game, Ascension resets your progress in exchange for permanent bonuses. It’s the prestige loop for anyone who’s maxed out their current lake and tank setup and wants a reason to keep going rather than sitting on a fully idle income stream.