Learn the basics of how to create, share, and play custom levels for Cave Crawler 2. This guide covers the basics of the in-game level editor.
Custom Level Menu
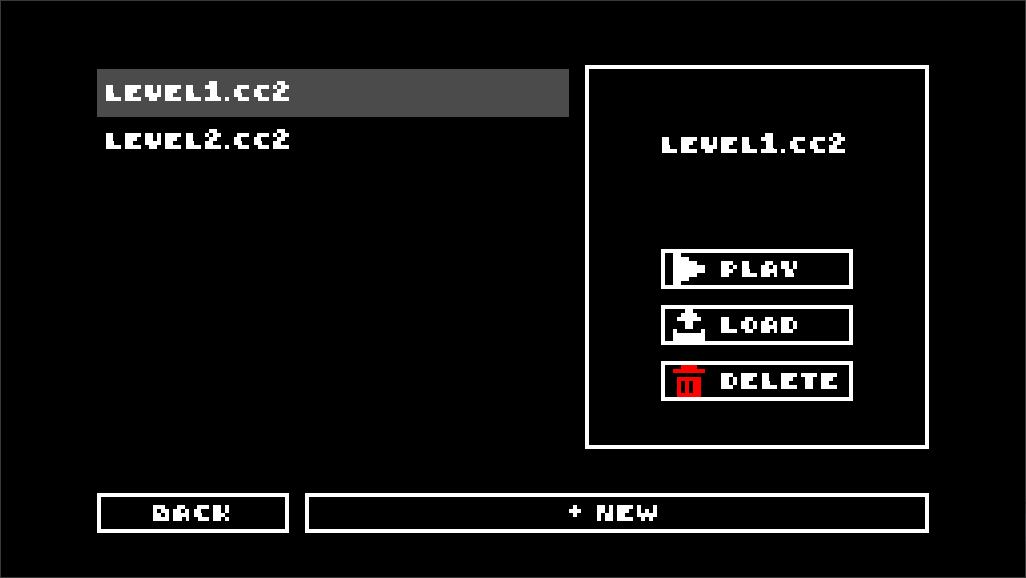
To create a level, select “New” at the bottom of the screen. This will prompt you to name your new level.
To delete a level, select its name from the list and select the “Delete” button on the right. This will prompt you to confirm.
To edit a level, select its name from the list and select the”Load” button on the right. This will bring you into the level editor.
UI Overview
To place a tile or entity in the level, find it in one of the tabs and select it. Then left click and drag inside the level. To erase most tiles and entities, right click and drag over them.
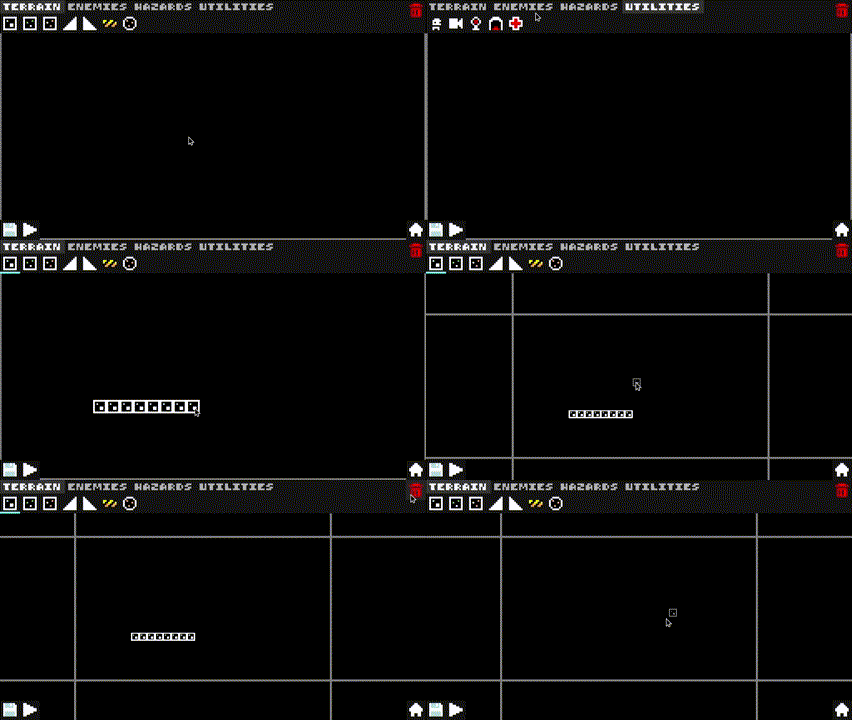
In the bottom left, click on the floppy disk to save.
In the bottom right, click on the home button to exit to the main menu. Exiting the editor will automatically save the level.
Next to the save button, click on the play button to play your level. You can only play a level if it contains the player. Playing a level will automatically save the level.
In the top right, click on the garbage can to wipe the entire level. You will be prompted to confirm.
At the top of the screen, there are tabs that categorize different elements of the game. Select items beneath the tabs to place them in your level.
To zoom in and out, scroll up and down. The grid in the background represents the size of the screen in the game.
To pan your view, middle mouse click and drag in any direction.
Camera Rooms
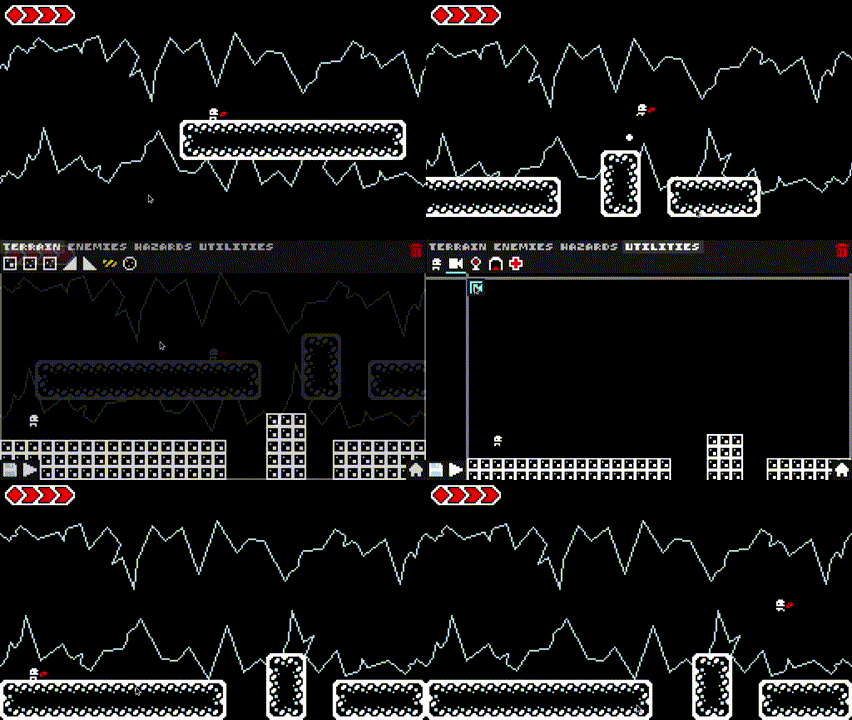
Although camera rooms are not required to play a level, it is highly recommended you use them. To use a camera room, select it in the utility tab and place it in the scene. The camera room tile is different from every other tile in that it can be interacted with within the editor. To set the camera room boundaries, click on the camera room tile, then edit the width and height using the input fields. You can use the arrows or type numbers to change the size.
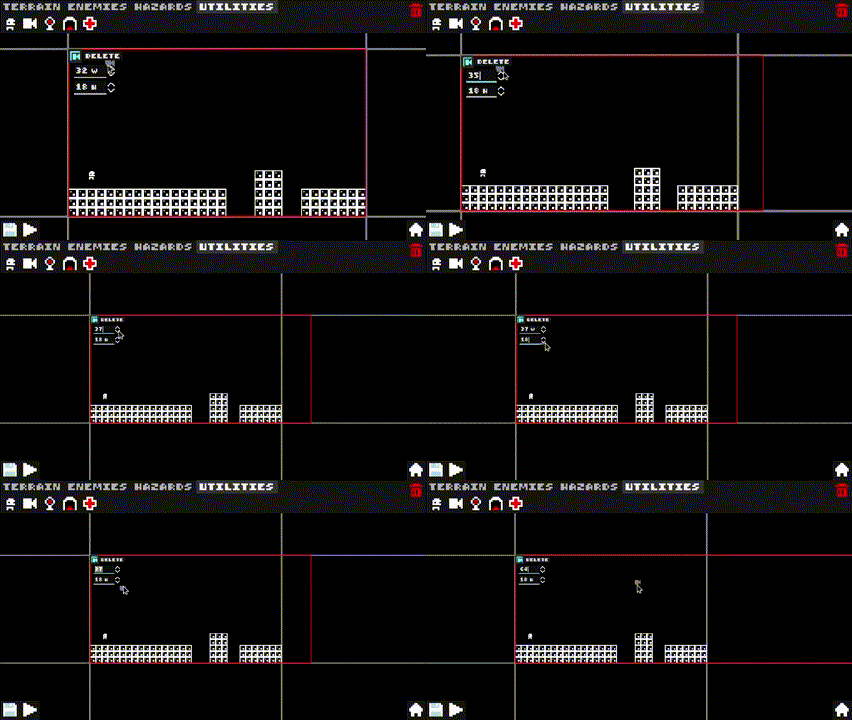
The boundaries of a camera room are previewed by the red outline that appears when it is selected. One unit is equal to one in-game tile. The minimum size of a camera room is 32 by 18, which is the size of one screen. The grid in the background of the editor is the same size, so you can use it as a reference when designing a level. To delete a camera room, select its tile and click the delete button next to it. To deselect a camera room tile, click on it once.
Moving Platforms
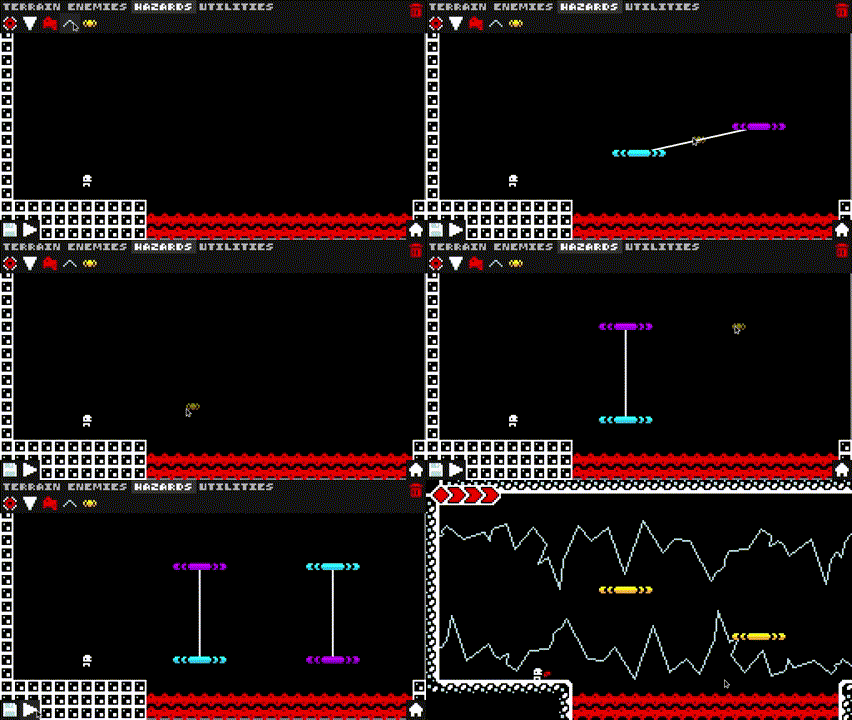
Moving platforms move at constant rate. When a platform reaches the end of its path, it will stay there for 1 second and then return back to the beginning. This cycle loops regardless of where the player is in the level, or whether the platform is on screen.
Importing and Sharing Level Files
Level files are stored in a folder in the user’s appdata. To find the level files:
Press “Win” + “R” → type “%appdata%” → click “OK” → open the “Godot” folder → open the “app_userdata” folder → open the “CaveCrawler2” folder → open the “custom_levels” folder.
The file path should look like this:
[DRIVE]:\Users\[USER]\AppData\Roaming\Godot\app_userdata\CaveCrawler2\custom_levels
Files inside of the “custom_levels” folder should have the extension “.cc2”. This is the only file type that the game will acknowledge. To play custom levels, paste .cc2 files into this folder.
You can view the contents of .cc2 files by opening them in a text editor. The contents of .cc2 files should look like a list of values in parenthesis. Each value inside of the parenthesis represents an item and a coordinate.
Example: (3, 15, 1, 0)
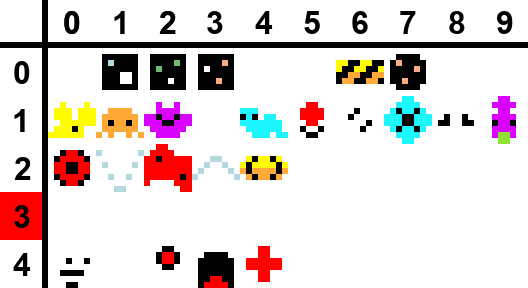
In this example, (3, 15) represents the x-y coordinate, and (1, 0) represents the item correlated with the atlas coordinates in the figure below. Lines with “CR” or “MP” represent camera rooms and moving platforms respectively.
